In our consumer world, old model of Android phones often get cast aside in favor of newer models. These old smartphones are still fairly powerful, and could be repurposed to host services. Using Termux and cloudflare replicas, you can transform old android phones into a fully functional, distributed web server. This guide will walk you through the process of hosting your own distributed blog with Android smartphones.
Why Host on an Old Phone?
- No Cost: No need for hosting services; your old Android device becomes your server.
- Minimal Power Consumption: Uses less than 5W, allowing it to run 24/7 without significantly impacting your electricity bill.
- Portability: Your blog is hosted on a small, wireless device that takes up minimal space and has built-in UPS (battery).
- Learning Opportunity: It’s a fun way to learn about Linux commands, web hosting, and network configurations.
- Eco-Friendly: By repurposing old phones, you’re reducing electronic waste and extending the life of the device.
What You’ll Need
- An old Android phone running at least Android 7.0 or higher (Android 5 or 6 is still possible but unsupported).
- The Termux app installed on the phone.
- A Cloudflare tunnel.
- A static site generator (like Hugo or Jekyll) for your blog.
Step-by-Step Guide
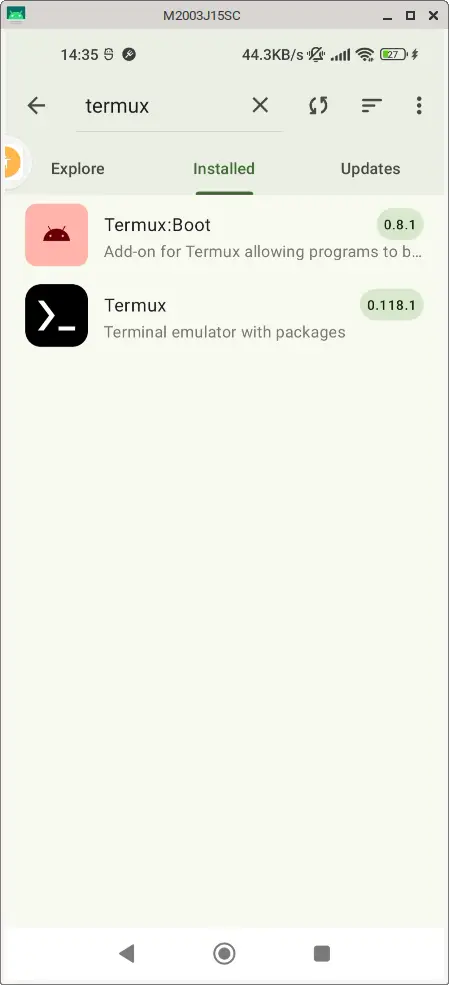
1. Install Termux and Termux:Boot
You can install Termux and its Boot plugin by downloading from F-Droid or the project’s GitHub page. You can download smaller Termux .apk by choosing a specific architecture instead of the universal apk on F-Droid.
2. Set Up Termux
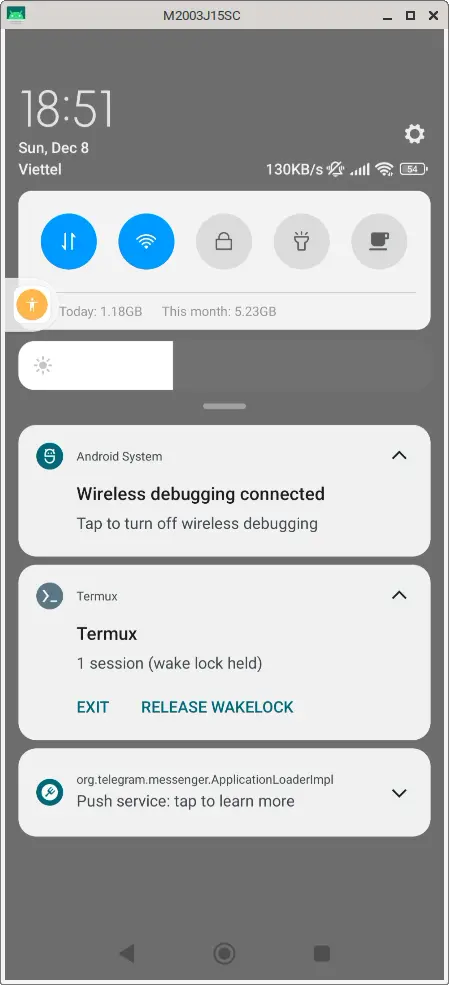
After the app has been installed, press the accquire wakelock button to prevent android’s power saving feature while the Termux session is active.
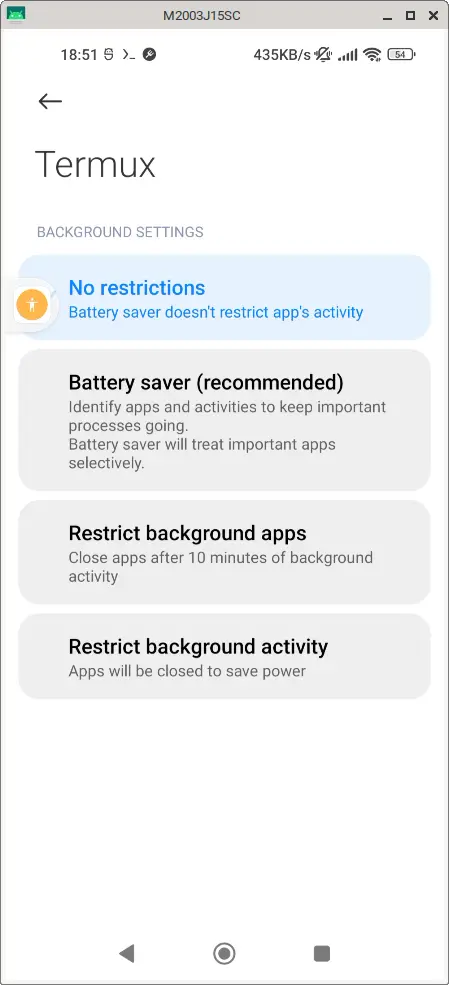
 Additionally, you may need to disable battery restrictions or apply dontkillmyapp methods if your ssh session is laggy.
3. Install necessary packages
First, we need to update default packages to the latest version.
pkg update && yes | pkg upgrade
Then, we need to install git, hugo (static site generator), cloudflare (expose webpage to public), openssh (remote access), termux-services (for controlling services), cronie (service for pulling changed contents on GitHub) and nginx (web server service).
pkg install git hugo cloudflared openssh termux-services cronie nginx -y
We restart termux so that the service-daemon is started. To enable and run crond, nginx and sshd run:
sv-enable crond
sv-enable nginx
sv-enable sshd
Set up password for ssh:
passwd
Now, you should be able to ssh using the password. Termux’s default use port 8022 for ssh, and we don’t need to specify a user. You can test ssh command on localhost:
ssh -p 8022 localhost
4. Set Up the web server
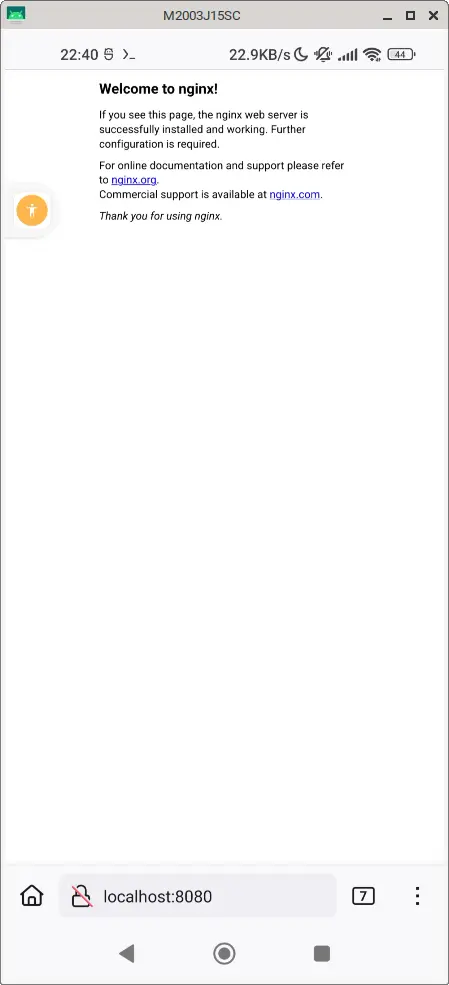
Let’s test our nginx server. Open your Android’s browser and go to http://localhost:8080. If our nginx service is up, you should see something like this:
 Next, we need to set up our blog. Follow the Hugo tutorial for more details:
hugo new site quickstart
cd quickstart
git init
git submodule add https://github.com/theNewDynamic/gohugo-theme-ananke.git themes/ananke
echo "theme = 'ananke'" >> hugo.toml
Now we add some new content to our blog call hugo command to build the site.
hugo new content content/posts/my-first-post.md
echo "+++
title = 'My First Post'
date = 2024-01-14T07:07:07+01:00
+++
## Introduction
This is **bold** text, and this is *emphasized* text.
Visit the [Hugo](https://gohugo.io) website!" > content/posts/my-first-post.md
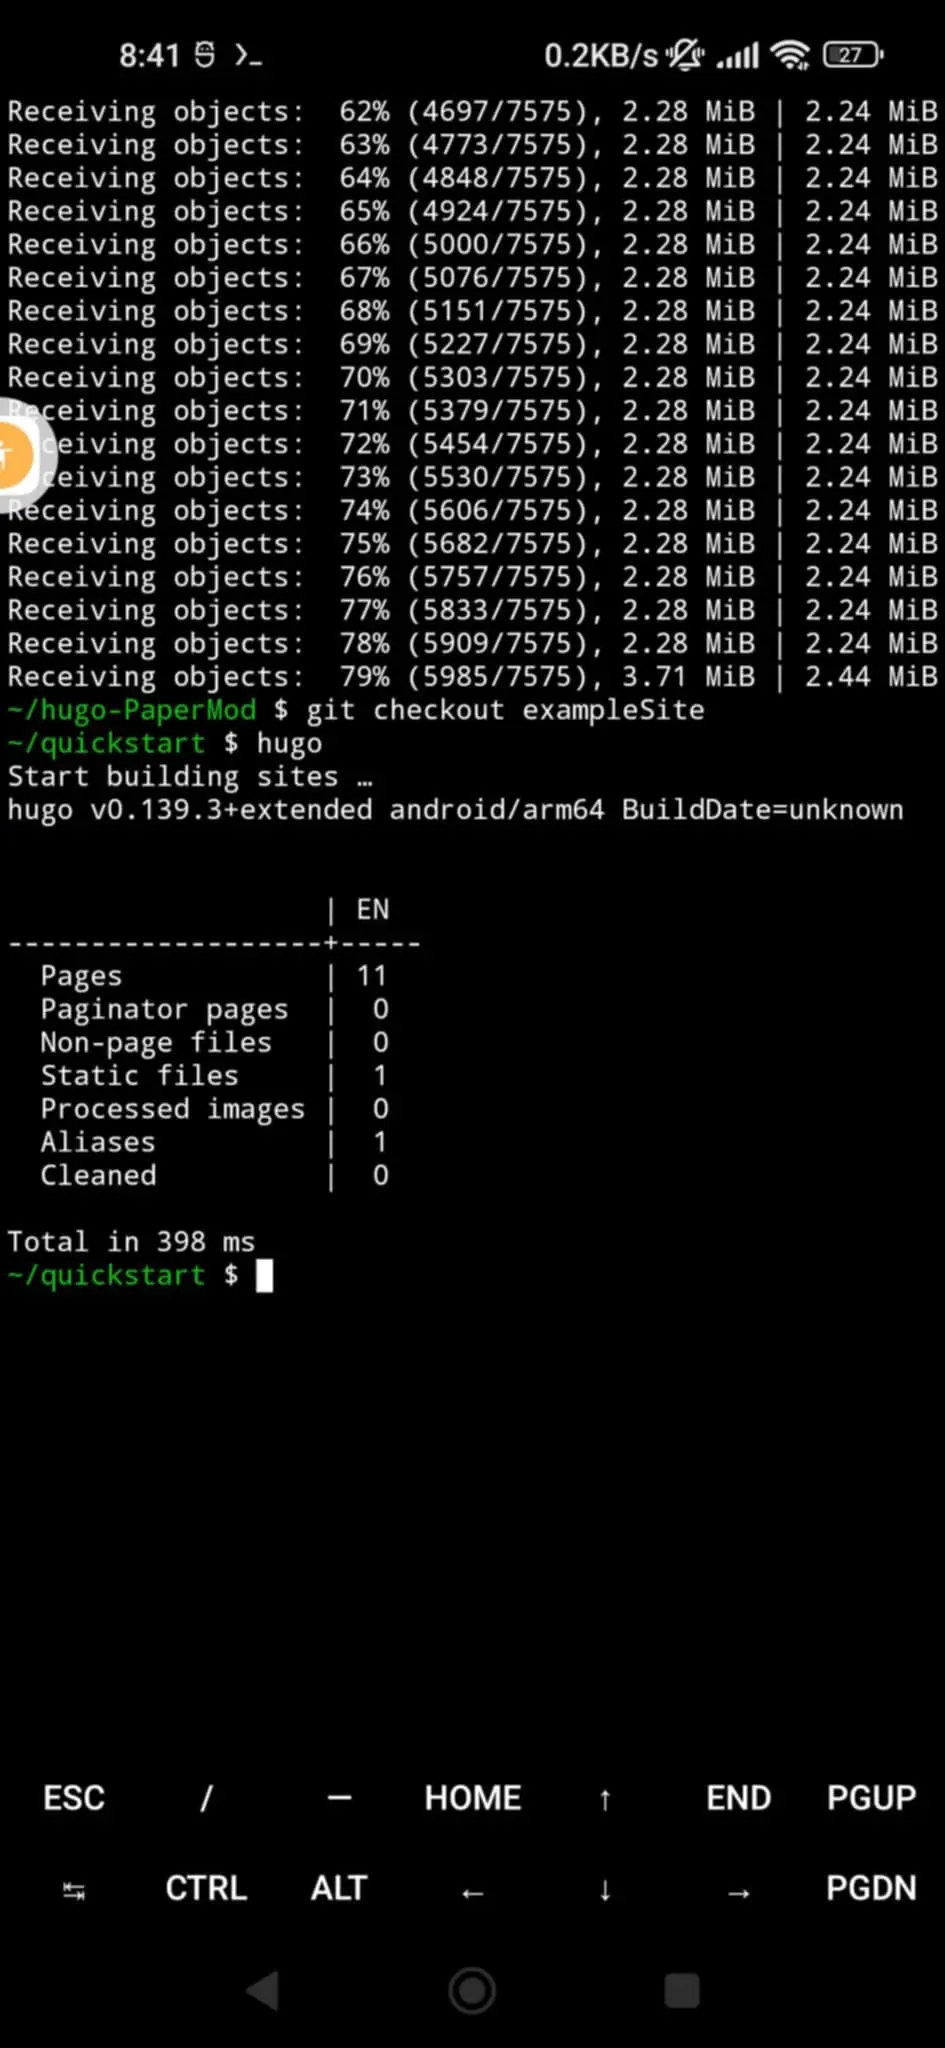
hugo
If hugo builds successful, you should see something like this:
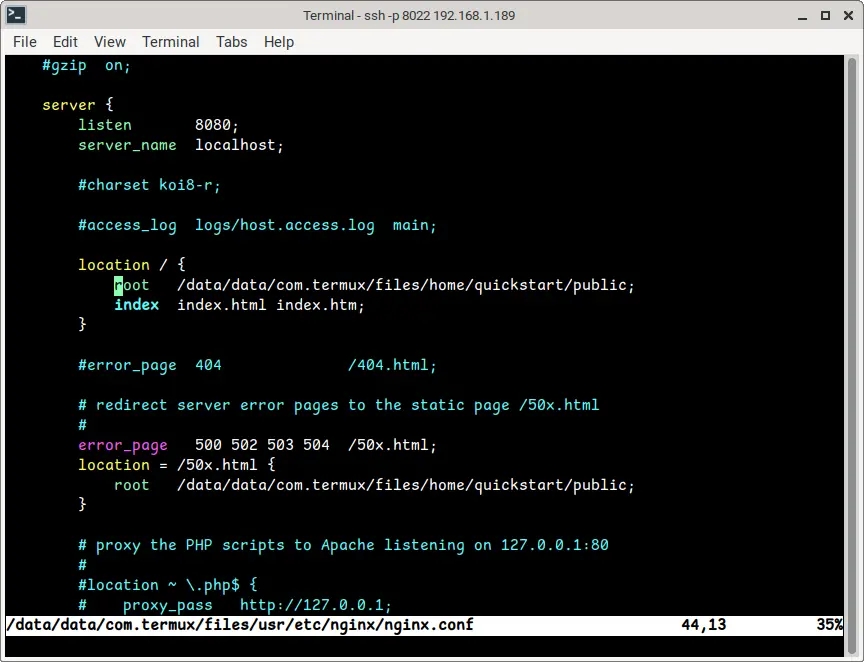
 Now we need to point nginx to hugo build directory (public folder) in nginx config file. To find nginx config file, type this command and look at the set configuration file option:
nginx -h
Use your editor to edit the config file:
vim /data/data/com.termux/files/usr/etc/nginx/nginx.conf
In the config file, look for server. Change the location of “/” and “/50x.html” root to hugo’s public folder.
 Reload nginx service after you have saved the changes.
sv reload nginx
Open your Android’s browser app. You should see your blog at localhost:8080
4. Cloudflare tunnel and replicas
Now that nginx is running, you’ll need to expose it to the internet. This is where Cloudflare comes in. Cloudflare is a tool that allows you to expose your local server without the need for port forwarding.
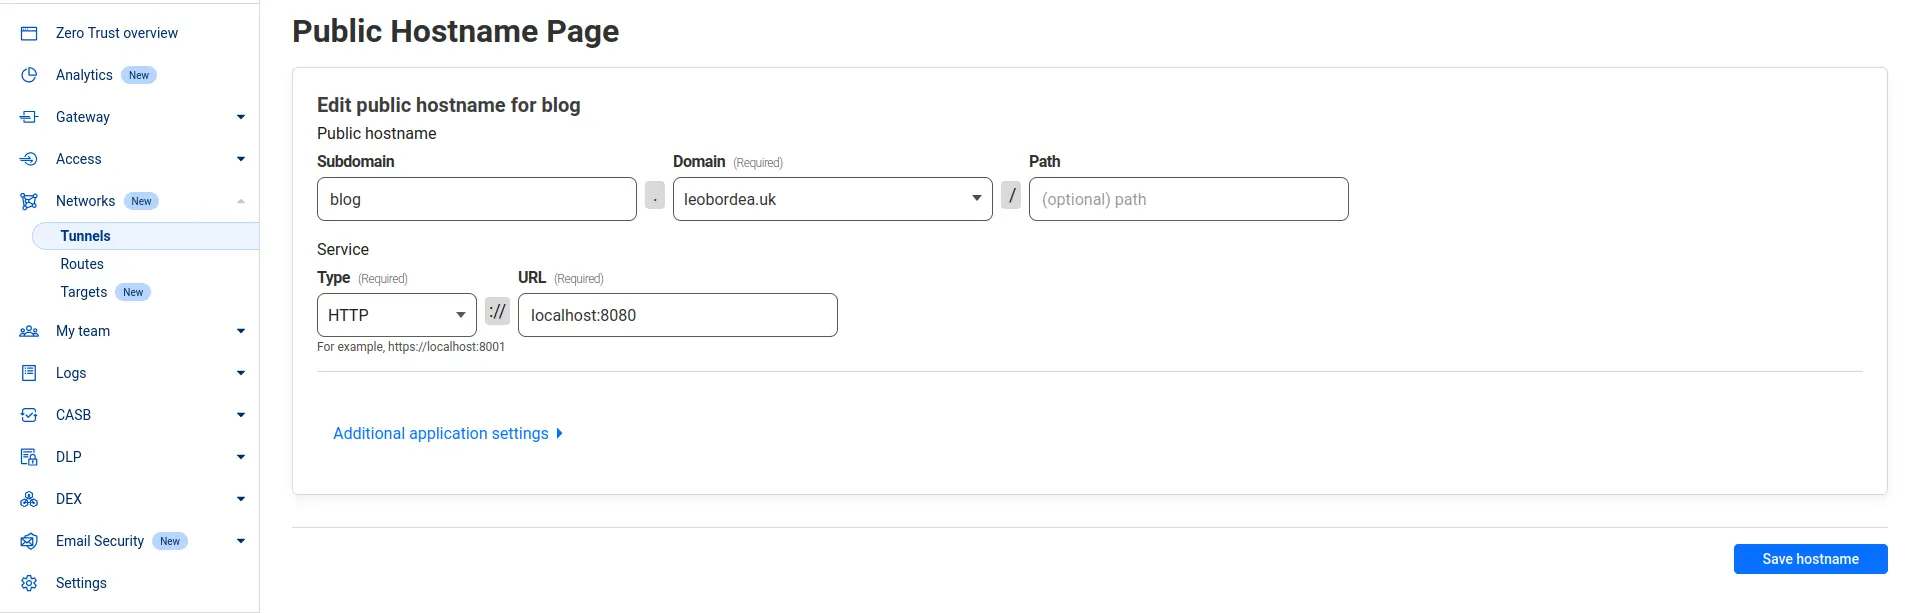
Open the cloudflare dash site and configure a tunnel like this:
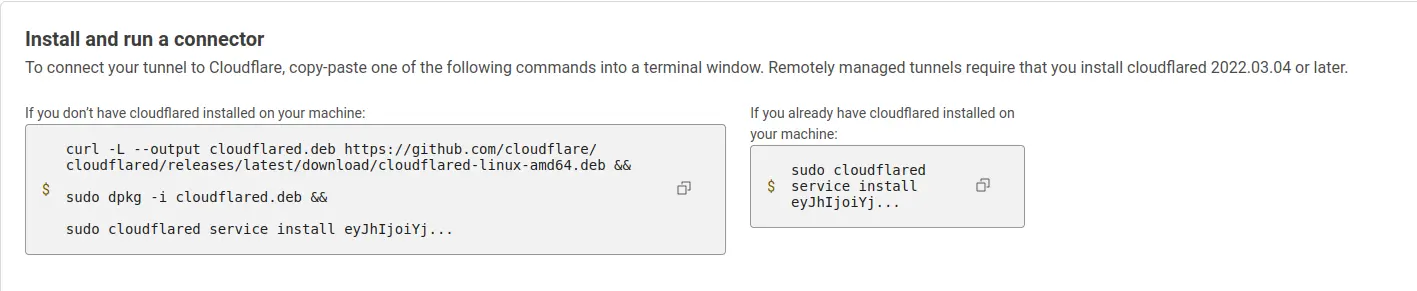
 You have already installed cloudflare in step 3. You only need to copy the token of the tunnel on the overview page and run cloudflare command.
 Cloudflare automatically does load balancing when you install two or more connectors. If you run the command below on another machine, you should see two different Connector ID on Cloudflare’s dash page.
cloudflared tunnel run --token eyJhIjoiYj...
Go to your browser and type the URL of your tunnel. You should see your webpage.
5. Auto start on boot and pull new content script
To set up Termux:Boot, follow the official guide or the steps below:
Go to Android settings and turn off battery optimizations for Termux:Boot.
Start the Termux:Boot app once by clicking on its launcher icon. This allows the app to be run at boot.
Create the ~/.termux/boot/ directory and put the script below in a file inside the ~/.termux/boot/ directory.
#!/data/data/com.termux/files/usr/bin/sh
termux-wake-lock
. $PREFIX/etc/profile
cloudflared tunnel run --token eyJhIjoiYj...
Reboot your phone to test the script. If the web server starts automatically, the script works.
To pull new content automatically, put the script that pull and update inside cron.
crontab -e
This is my script to check for update automatically after 5 minutes and rebuild up there is new content:
*/5 * * * * cd /data/data/com.termux/files/home/my-blog && git fetch && git diff --quiet HEAD origin/main || (git pull && hugo && nginx -s reload)
To enhance redundancy, you can replicate the same steps outlined above on another phone. This ensures that your blog remains accessible even if one device fails. Additionally, consider combining all the steps into a shell script. This approach simplifies the deployment process, making it easier to set up additional smartphones for hosting your blog. By automating these steps, you can save time and ensure consistency across devices.
Conclusion
Using these steps, I successfully hosted my personal blog on old Android phones, demonstrating that even outdated devices can find a second life in hosting applications. Give it a try and watch your old devices come back to life in a whole new way! If you like the idea of repurposing old Android phones to host a personal blog but are having trouble following the steps, feel free to reach out to me at [email protected]. I’d be happy to help you troubleshoot or clarify any part of the process!
Year 1 update
On the software side, it’s stable — but the hardware is a different story. Termux and the software running in the terminal emulator are generally reliable, with almost no crashes. I had set up the above steps on a phone at another location for Cloudflare replicas. This place has unreliable Wi-Fi, which decides to not connect at times, so I have to schedule the phone to automatically reboot at times. In my experience, Termux and the associated software handle this well, and my blog is seldom down.
The hardware, however, is less dependable. I now have two spicy pillows; luckily, they haven’t caught on fire yet. One device occasionally freezes during reboot and becomes unresponsive to the power button, requiring having to manually remove the battery.
Here is a video of me hosting my university’s course project on smartphones and benchmark the web server using locust: